The problem: My cab reeked of gasoline, and there was no where to stash my tools and stuff. The bigger problem: I use my truck like a truck, and can’t have my spare tire or a fuel filler in my bed. There goes the ramcharger tank, full size van tank, fuel cell, and Blazer/Bronco tanks (not to mention only Dodge parts on my Dodge truck, thank you). Someone mentioned a Lifestyle era tank might work, so I went outside and measured the one under the ’74 D200 crew cab in my driveway. It looked promising… What follows is my chronicle of replacing the in cab gas tank on a ’61-’71 Dodge truck, with one from a ’72-’93 Dodge truck.
From the donor truck (1977 D200), I pulled the tank, sending unit, straps that hold the tank in place, and all associated hardware.
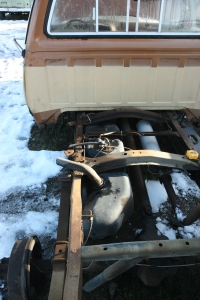
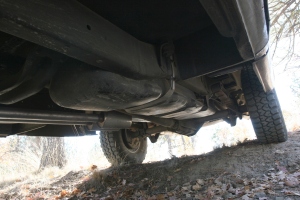
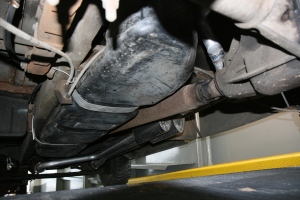
Once home and cleaned up, I laid a chunk of 2×4 across the saddle on my floor jack to spread to weight, balanced the tank on top, and lifted it up under my ’68 D200 to see if it would indeed fit… Fortunately for me (and now you), it “fit” VERY well. I won’t bother detailing exactly where it goes, as there is only one place under the truck it will fit… Being a dedicated cheapskate, I reused as many pieces from either truck as I could possibly figure out how to make work for me. Originally the poly tank was supported by three straps, but I was only able to make use of two of them.
Enough storytelling, here’s the nitty-gritty.
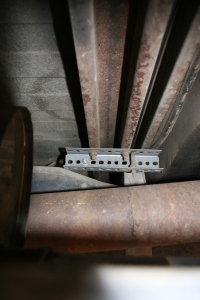
Starting on the front right (inside), I used some scrap perforated angle iron (like they use to hang garage door openers, etc) I happened to have laying around, and made up a bracket to hang the strap from (the bolts holding it together I stole from the third tank bracket…). I drilled two holes in the bed cross member, and used the bolts from the donor truck brackets.
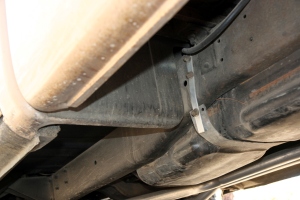
On the front left (outside), I found a stray piece of roughly 1/4″ x 3/4″ aluminum in my shop, and drilled two holes in it to match existing holes in the frame. I test fit it, pulled the tank strap as tight as I could, and marked the hole for the tank strap.
On to the rear. Rear right I drilled two holes in a bed cross member again, this time reusing the donor truck mounting bracket.
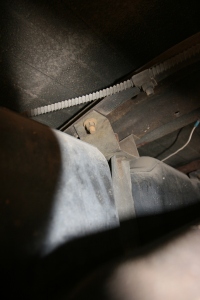
On the rear left, though it’s hard to see in the picture, I bolted another piece of perforated angle iron to existing holes where the parking brake bracket used to attach.
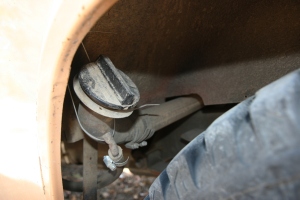
I tried a number of different filler tube ideas, but finally have had moderate success with one. I went down to my friendly independently owned local muffler shop, and had them bend me a piece of two inch exhaust pipe. I wish I could remember what degree I had them make the bend! If I had to guess, I would venture in the 18 – 20 degree area. But do your own figuring, please. Then I cut both ends off to fit my needs. Trimming a little sheet metal in the wheel well was necessary to slip that tube over the frame rail (mine is trimmed a little bigger than I’d like, but it’s leftover from my previous attempts). I bought a short section of two inch rubber gas hose from NAPA (I could only afford a short section, that stuff isn’t cheap! {Checker/Shucks/Kragen won’t cut it, they want to sell you the whole long piece for like $50?}). I used one three inch section to connect that tube to the gas tank stand pipe. Another three inches of it was used to connect the other end to a stock gas cap/ filler off another ’70’s Dodge truck. I cut that off however seemed best as well.
I’m getting tired, so I hope I don’t loose you with these boring details now.
Since both the filler tube piece and the tank sending unit had a filler overflow, I went ahead and hooked that up. I also ran a tank vent up into the bed side, above the level of the tank, and away from mud and gunk off the tire.
I drilled one final hole in another bed cross member, and added a ground wire from the top of the sending unit (there was a stud for one already) to the body.
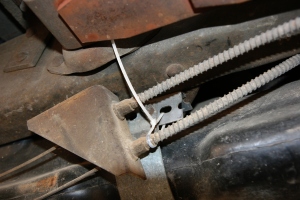
Then I cut the original fuel line where it came down from the in cab gas tank and turned toward the front of the truck. I acquired ?10′? of rubber fuel line that I connected there, ran across the back of the cab, and down the frame rail to the sending unit. Put a couple zip ties in existing holes in the bottom lip of the back of the cab to secure the new fuel line for now, and we were ready to roll.
As you can see, I no longer have an operating parking brake. I went back and snagged the parking brake brackets off the ’77, but haven’t bothered trying them out yet. I may never get to it, as my pending Power Wagon conversion will include a line lock.
Since this is in my “parts for sale” blog, I will justify this post by mentioning that I may have to offload this set-up, because the chances of it fitting behind a transfer case aren’t looking very promising… Back to the drawing board.

Thanks for this great info. I have a 66 D200 Crew, and am looking at getting a fuel tank from an 85 dodge 2500 to do the same. This has been great information.
Huge bummer. I found an 84 dodge fuel tank, with dimensions around 67″x13″x13″ for cheap. But I just went out to my CrewCab and was measuring the space that you reference, and there appears to be no way that this will work on a Crew. Looks like I may be stuck with a tank under the spare tire area, OR, finding two properly sized ‘saddle tanks’ to go under the rear quarter panels on either side of the bed. Any thoughts/suggestions?
I just went out and measured my tank, and it is roughly 67″Lx13″Wx10″H. I’m not keen on all the differences between crew and regular cabs, but I’m having a hard time figuring out why it wouldn’t fit under your truck? Where are you anticipating the problem (crossmember in the way, too long, etc.)?